How to Build a Home Photography Studio in a Small Place
WATCH THE VIDEO OR KEEP READING TO SEE EVERYTHING YOU NEED TO SET UP YOUR own HOME PHOTOGRAPHY STUDIO EVEN IN A SMALL PLACE
It’s very clear that with what is going on in the world, we, photographers, are struggling to work with models. Our shootings have been cancelled, postponed or they are just not in demand as much anymore…
Well, something that is in VERY HIGH demand is product photography! Everyone is jumping to the online world and they need professional e-commerce shots. They also need social media content for their brand and guess what? You can do everything for them in your home!
You will learn way more by watching the video as I show you my home studio in London and how I’ve managed to do professional portrait photography work, fashion, and product photography here for years!
However, if you can’t watch right now, I summarise everything you need to know below! :)
which backdrop to get?
Well, for those who don’t have the budget, all you need is a white wall! However, this is keeping in mind that you do just portrait work. If you do product photography or e-commerce in general, it would be highly recommended to get a white one.
I own a black one because I LOVE to take moody pictures. Both for portrait and product photography. So this is entirely up to you and your taste. :)
My hack regarding this matter is getting a “car size” backdrop. Normally, there are two main sizes:
1.35 metres
2.72 metres
But the Car Size (2.08 metres) is an “in-between” size that is great to have at home! I’ve found that the small size was too small and the big one too big to set up in my own flat. However, this third option is great! And it’s also super useful for when you have to transport those rolls in your car.
WHAT ABOUT backdrop material?
For me, there is nothing better than paper! You won’t have unwanted reflections, the backdrop won’t crease, and they last quite long if you take care of them!
I’ve talked about this in an interview with Shutterstock: Tips for selecting the right backdrop.
For both portrait and product photography, that matt finishing in the pictures is crucial! And more if you are shooting with flash or lighting that you don’t want to be reflected in the background.
locating your backdrops
If you live in a small place or you just want to save money, the best hack I’ve ever learnt was to get a curtain pole from Ikea! It’s under £8 and you will get the bar and two hooks to hang your backdrops anywhere in your house!
With this method, you will save a lot of space and money.
However, if you have space and the budget, I highly recommend you to get some backdrop stands. You will be able to carry your studio wherever you want, even to your client’s house if you need to!
This one is very affordable: Check it out here.

Backdrop Stands
They will allow you to have a mobile studio that you can take with you anywhere. You can shoot outdoors with natural light or even at your client’s home if you need to. This one is very inexpensive for its quality.
Lighting: flash or continuous light?
I own a continuous light and a flash. The continuous light is very good for video, for beginners to be able to see how the pictures are going to come out right away, and for some photoshoots. However, I personally prefer flash. I shoot portrait photography and I like my models to move a lot. This way they appear more natural. When they are moving, the flash freezes the movement and this is key. Otherwise, with continuous light, I would have to shoot at a very high shutter speed. This is because they are way less powerful than a strobe. The result? a very dark picture without enough light…
For product photography, for example, if you shoot with a tripod at a slower shutter speed, you can still use continuous light. You can shoot slower to allow more light into the sensor but still, if you want those product shots where the product is flying or splashing water, something more creative, those pictures are done with flash as well.
I've got both because I do video. So this is entirely up to you! :)
The most affordable continuous light that I own and I’m very happy with is this one from Godox.
And the most affordable studio flash that I also own and love is this one.
best softboxes: size and shape
If you're a portrait photographer like me, you should take a rounded light modifier because you're going to get the catch light in the eyes of your subject and it's more natural on the eyes. For those who don't know, catch light is the reflection of the octabox or whichever light source you are using in the eyes of the model. So if it's rounded, it's more natural.

Catch Light
Catchlights are the bright, specular highlights found in a subject's eyes that are reflections of the light source or sources.
They will appear the same shape as the light modifier you are using.
When a portrait is lit with available light, the sky, a window, or other available light sources can be seen reflected in the eye, however, such a soft or even dull light source may not create that "sparkle" in the subject's eye, as an added light source can.
Should you take a Big one or a Small one?
I do own both. I would say, if you have a small studio or you are in a bedroom, the perfect size is 65 centimetres in diameter.
You can check mine here.
It's super handy and even if you are in a bedroom is very, very good because it doesn't take too much space. It folds like an umbrella. I took it many times to different businesses to do headshots and it’s super easy to transport! :)
The difference would be that the small one is better for portraits or half body. However, it focuses the light more wherever you point it at. I personally like it as sometimes the light can look more dramatic.
I also have a huuuuge one! which is 89 centimetres in diameter. And this one, even if it’s way bigger and it takes way more space in my home photography studio, is my favourite one! As bigger the surface, the smoother the skin of your models.
It’s also better when you want to light more of your subject and take full body shots.
This one is mine.
Both of them are the most affordable ones out there but if you have the budget, my favourite is this Elinchrom Rotalux Deep Octabox of 100cm in diameter.
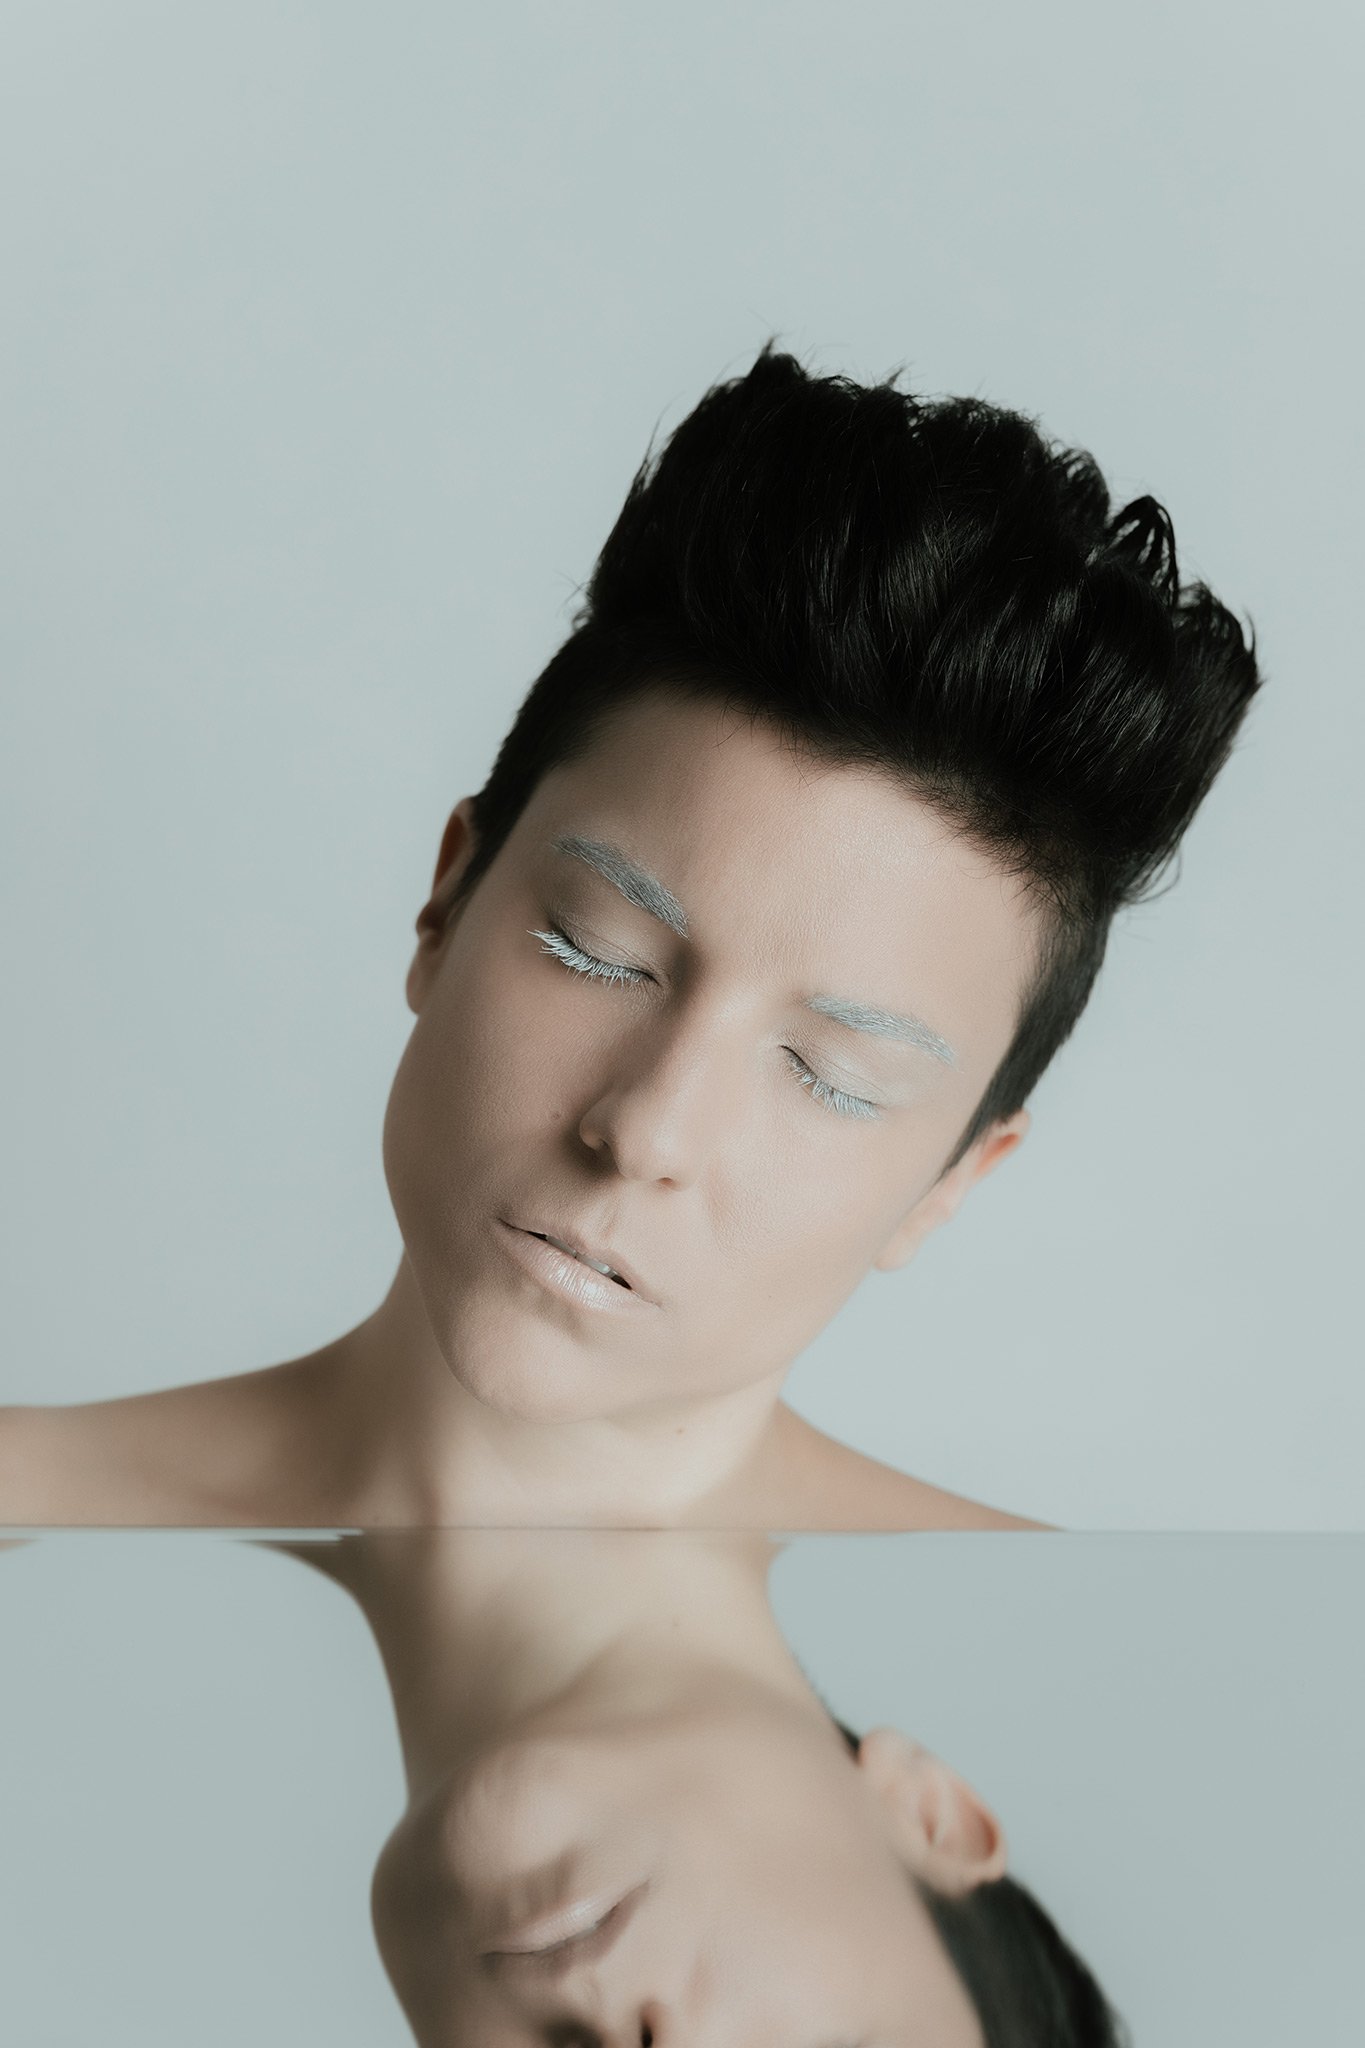
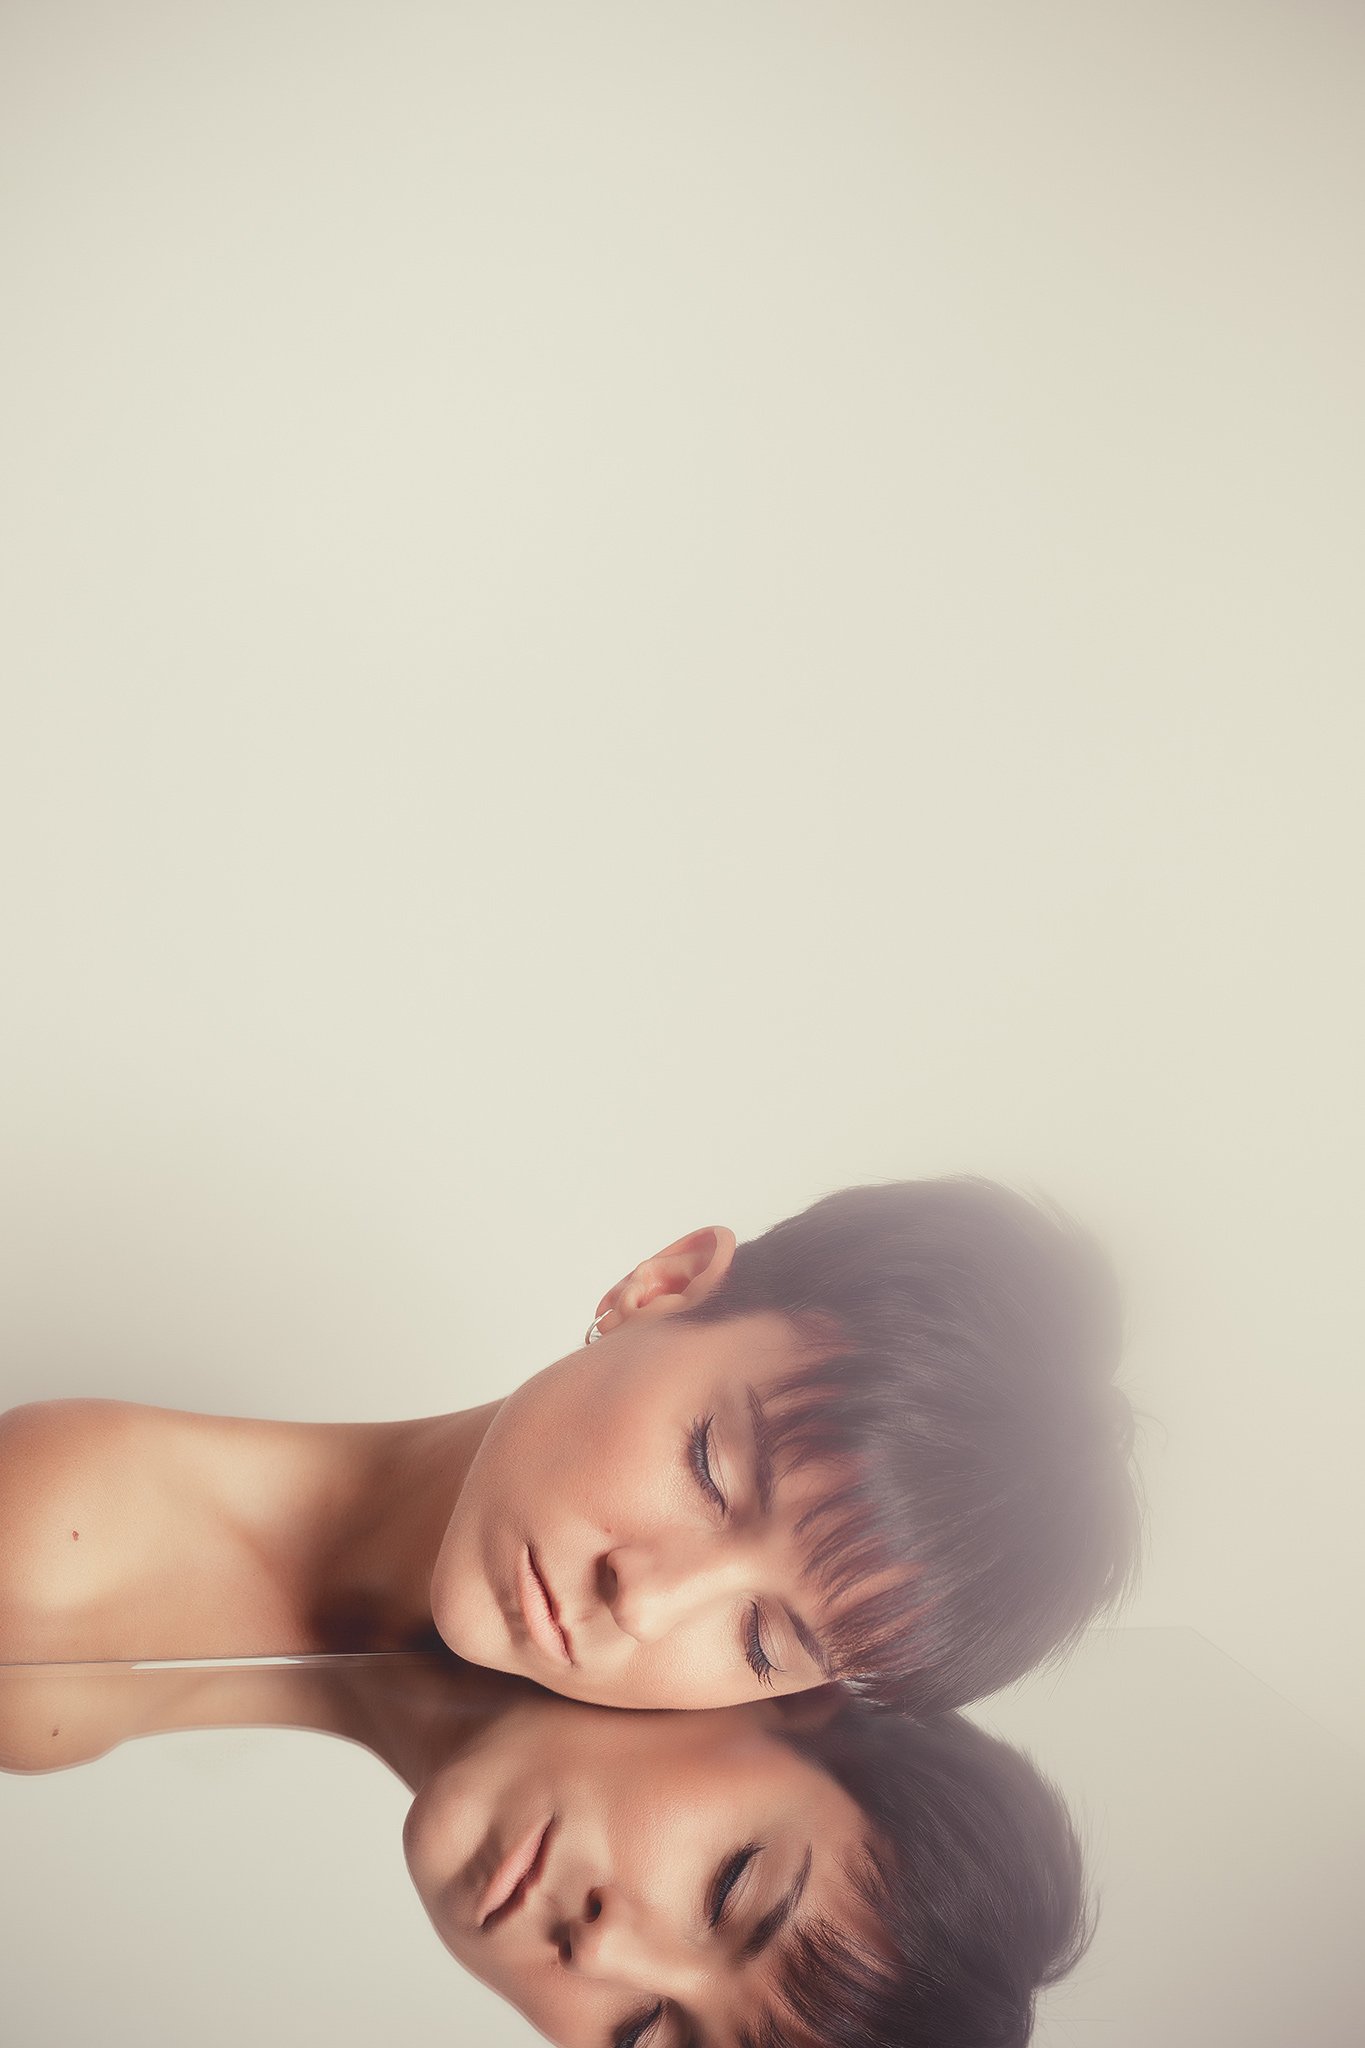
This one is very deep. This particular shape distributes the light in such a tridimensional way around your subject. I LOVE how soft and even the light is. I can promise you that it does make a huge difference when you decide to invest in good gear!
These self-portraits below were taken with it:
ACCESSORIES
TRIPOD
All my tripods are from Manfrotto, as also my backdrop stands. I have been using this brand since I started Photography over 13 years ago! And guess what? I still have all my tripods in PERFECT conditions! With over 13 years of use…
I know you may not have the budget now and you may be looking for cheaper options, and that’s totally ok. However, Manfrotto has such affordable tripods nowadays and you can rest assured that they will last for yeaaaars! So at the end of the day, it’s an investment and you will end up paying less in the long term.
LIGHT-STANDS
I also recommend Manfrotto but if you are looking for something extremely affordable, I do own this set of 2 light stands from Neewer.
The only thing you have to check when you’re going to buy the light-stands is that they hold enough weight to support whichever light you’re going to locate on them. It’s always in the description of the product.
TETHER CABLE
A very inexpensive item that will make your life way easier! A tether cable will allow you to connect the camera to your computer. By doing this, you will be able to see every picture you are taking while you are taking them. It’s tremendously useful to check the images on the big screen and avoid unwanted unfocused areas that sometimes we don’t get to see on the small LCD screen of our cameras…
If you shoot outdoors, it looks very professional to take the laptop with you and do your sessions tethered. And if you have someone helping you, that person can check how the pictures are coming out and correct you if you need to change settings. This speeds up the workflow and avoids unpleasant surprises when you check the pictures on a bigger screen!
The tether cable is also extremely useful to preview presets in the images while you are taking them. This way you have a perfect view of how the pictures will look once the presets is applied and it will help you correct colour temperature and lighting to adapt that preset better.
This is the best Tether Cable. The one I have and every professional photographer out there:
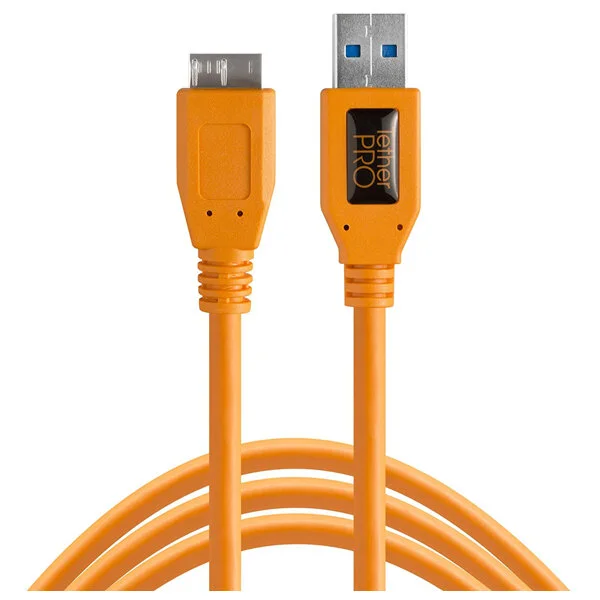
Tether Cable
Every camera has different connections so make sure you get the right cable with the right port connections for yours.
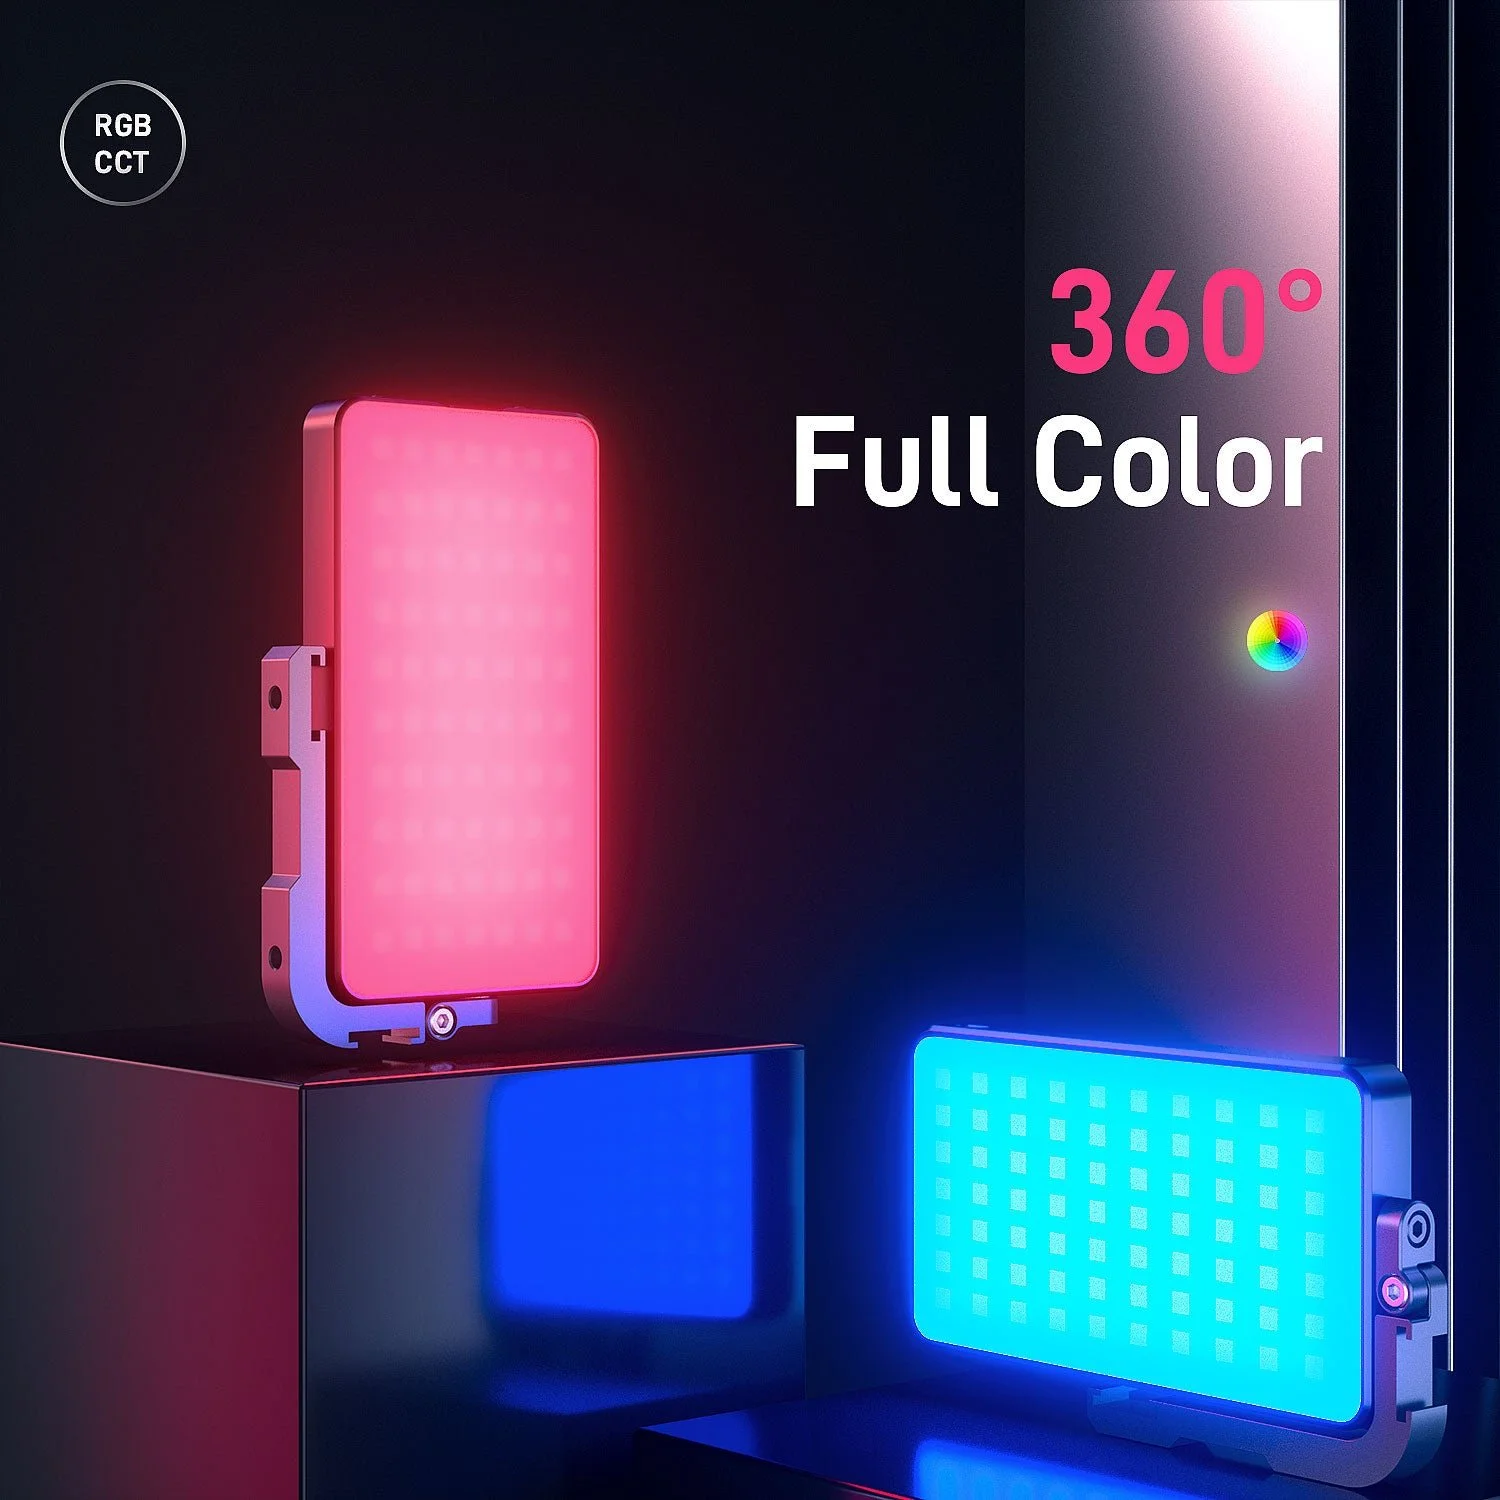
RGB LIGHTS
If you follow my work here, on my YouTube Channel or on my Instagram account, you know that I LOOOVE using RGB Lights. You can get super creative with them! I own a set of 2 from Neewer for my home photography studio. They come as a set of 2 light heads, 2 light-stands and a carrier bag.
The batteries are optional and sold separately. I did get them because I find them very useful when you shoot outdoors or in different locations when you can’t plug them anywhere.
You can find my very affordable RGB Lights HERE
And the Charger and Batteries HERE


Experimenting with the colour wheels, you can create every colour combination you like. You can also use just one colour depending on your creative needs.
As an extra tip, you can go to the Adobe Colour Wheel tool to look for colour combinations. This tool is used by professional photographers and filmmakers to light their scenes. Not all the colours go well together so this will help you immensely to choose the right ones.
I also use RGB lights a lot for my YouTube videos. So if you are into video including TikTok, Instagram Reels or YouTube, they will serve you well too!
POCKET RGB LIGHTS
If you want even more affordable RGB lights that you can carry in your camera bag, check out my Pocket RGB Lights.
They do an incredible job in the studio, the batteries are built-in and they last a lot! Over 3 hours at full power.
You can watch a full behind the scenes video on my channel where I used these for creative portrait photography.
REFLECTOR
A super affordable accessory that you need to add to your home photography studio!
If you own just one light or even if you own more, the reflector will allow you to bounce light towards the shadows of your subject. Those that you want to fill in.
This one here is great to use in the studio or outdoors during those sunny photoshoots… We all know how annoying harsh sunlight can be and owning one of these is a must to fill those hard shadows while shooting outside your home studio.
CONCLUSION
If you really don’t have the budget, get one light and one light modifier. That’s it! For backgrounds, look for a white wall in your house and wait till you have the budget to get at least one paper roll. The holder… I’m sure you already can afford that curtain pole from Ikea mentioned above! :D
We all start with the very minimum gear, the main stuff. It takes time to build a better studio so don’t feel frustrated. I remember how impatient I was to get all I wanted and it was totally pointless… Everything takes time but if you really want it, with a bit of patience, you will get it! :D
I hope this post was useful and helped you choose the right gear for your home photography studio. Any questions, please feel free to comment below. I will be more than happy to help!
- YOU MAY ALSO LIKE THESE POSTS:
If you want to know more, check my Youtube channel for weekly videos about Photography, Tutorials and Creative inspiration! I hope to see you there!
CHECK OUT MY PREMIUM PRESETS BELOW: